Raspberry Pi Zero W Setup Guide
Table of contents
This guide provides step-by-step instructions for setting up a Raspberry Pi Zero W with the necessary software and configurations for development purposes.
Prerequisites
- Raspberry Pi Zero W
- MicroSD card (8GB or larger recommended)
- Internet connection
- Access to a computer with an SD card reader
- Clone https://github.com/adamcohenhillel/ADeus
Installation Instructions
1. Download Raspberry Pi Imager
Download the Raspberry Pi Imager from the official Raspberry Pi website:
https://www.raspberrypi.com/software/
2. Download OS Image
Download the Raspberry Pi OS Lite (64-bit) image from the following link:
3. Prepare SD Card
- Unzip the downloaded OS image.
- Insert your SD card into the computer.
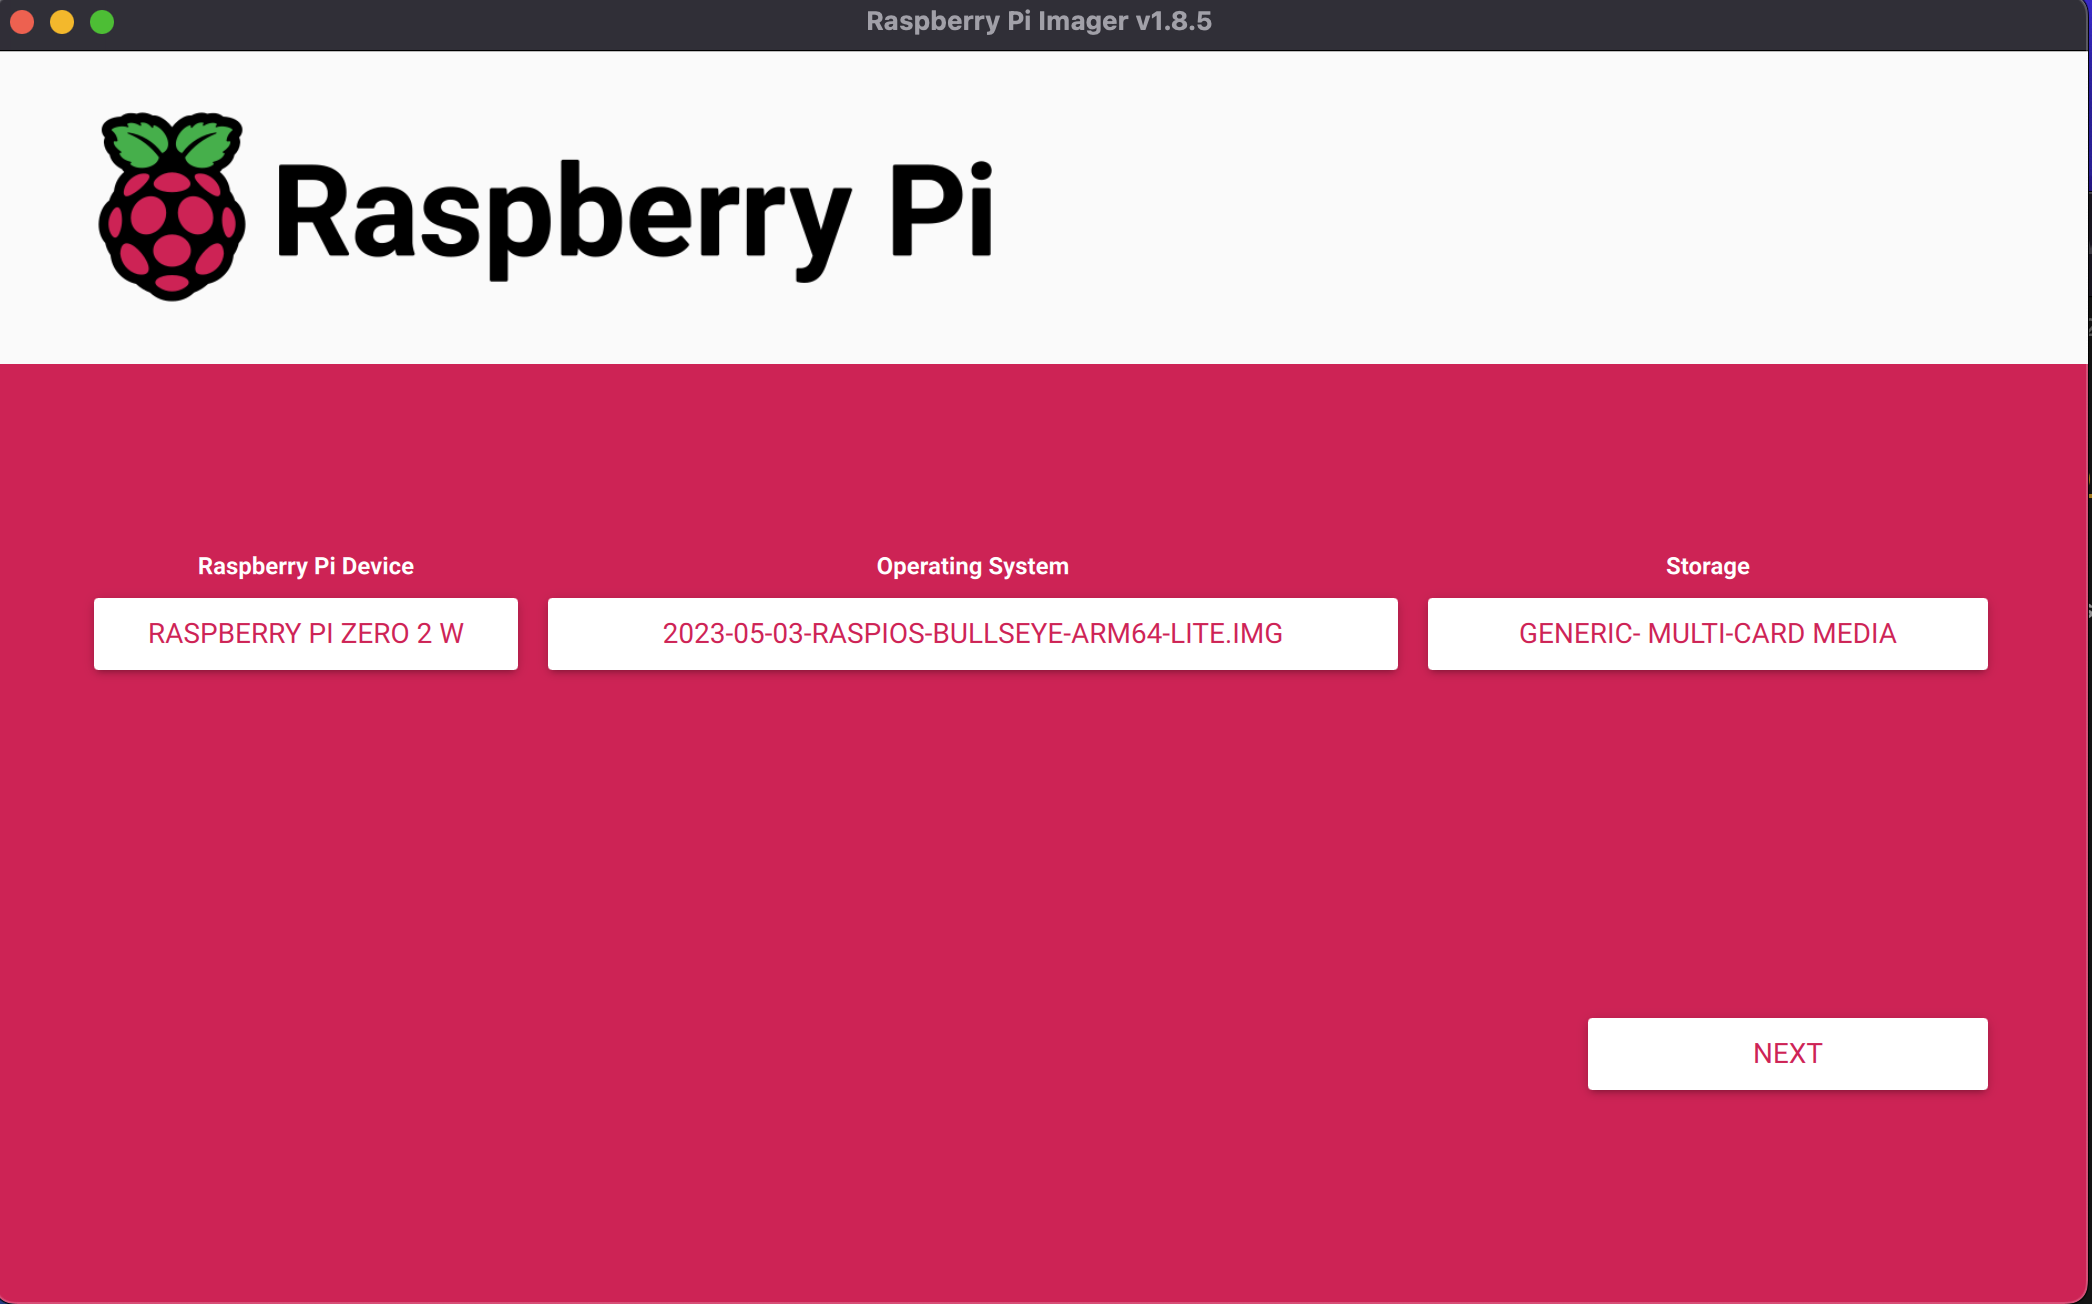
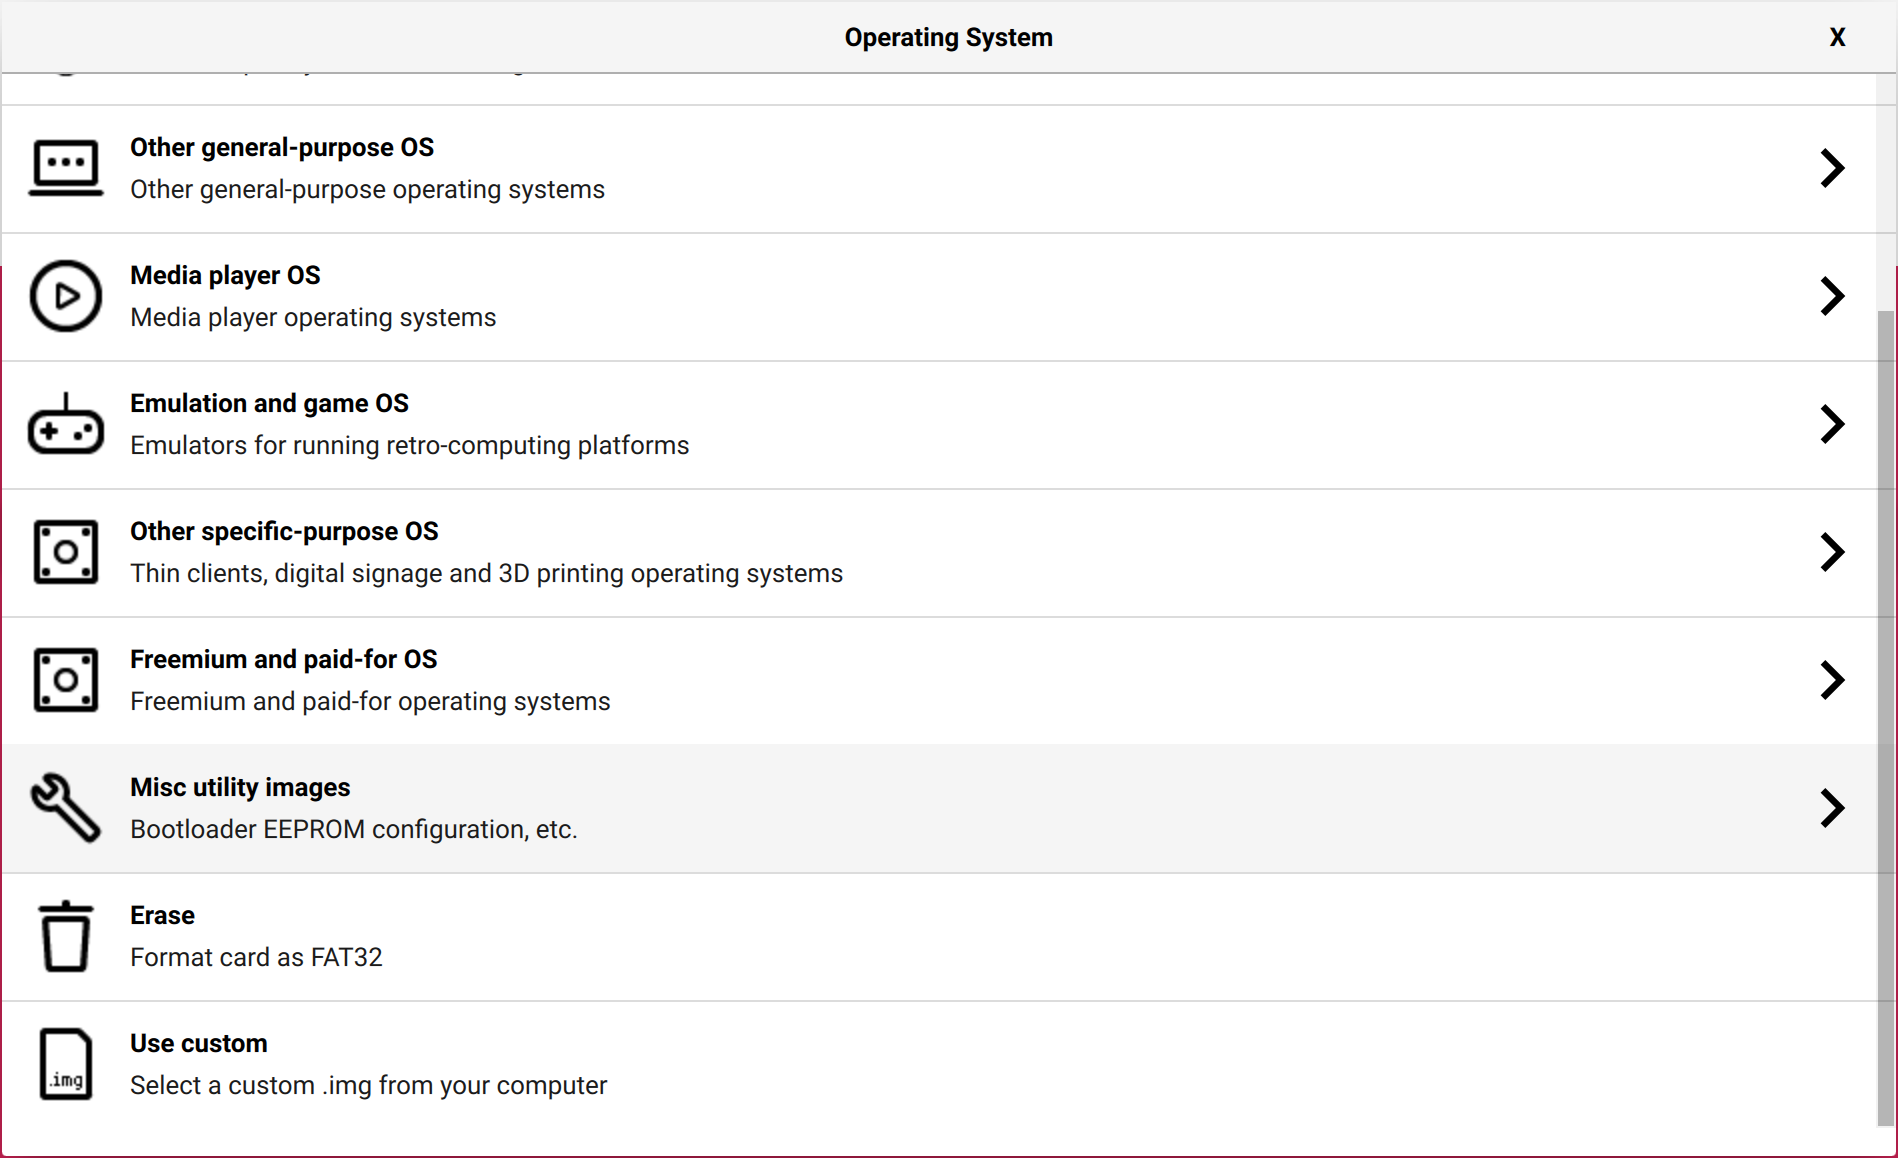
- Run the Raspberry Pi Imager and select the unzipped OS image by clicking “Operating System > Use custom”.
- Make the device selection as prompted.
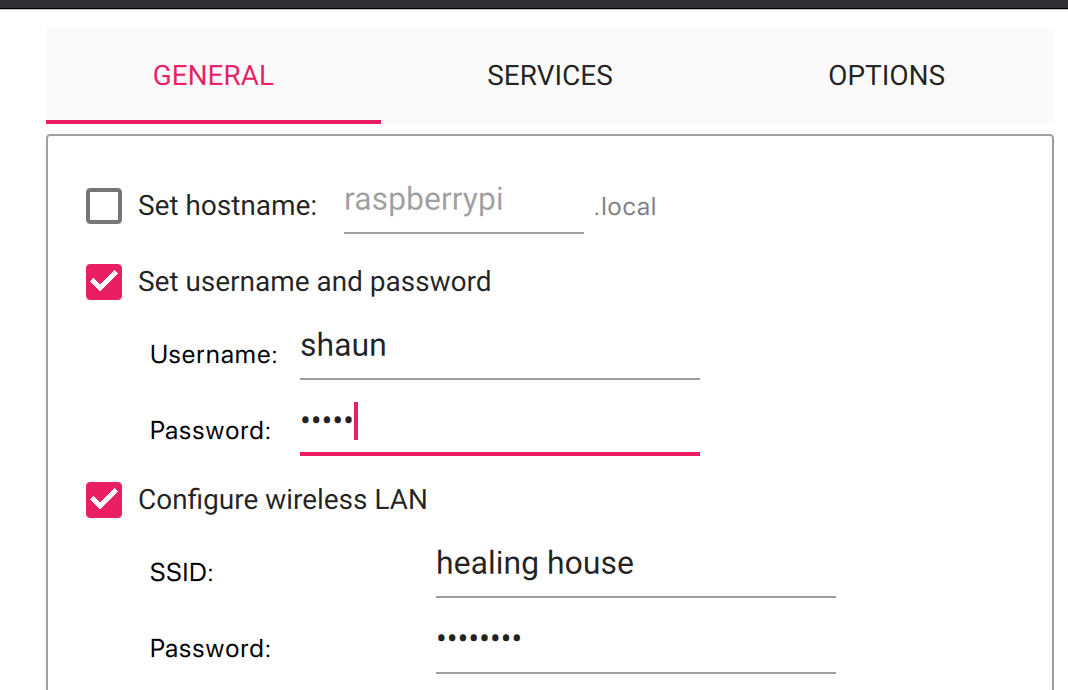
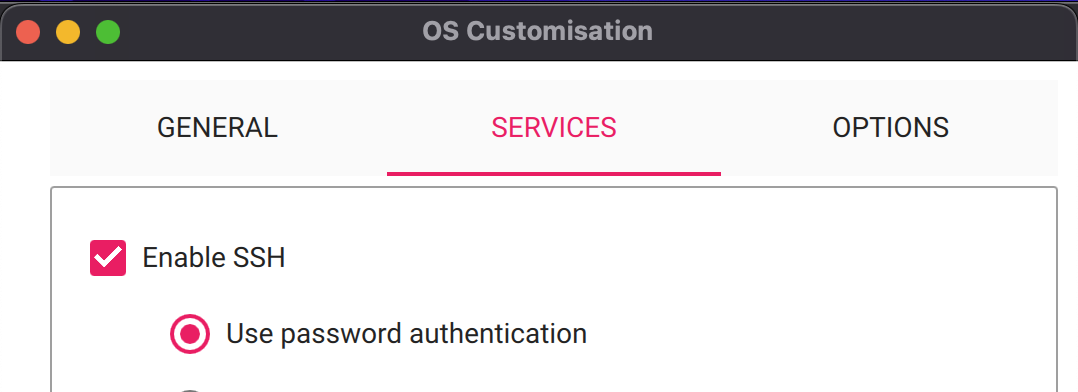
- Edit settings to:
- Enable SSH(under Services).
- Add a username and password.
- Add WiFi settings.
- Write the image to the SD card.


4. Boot Raspberry Pi
- Insert the SD card into your Raspberry Pi Zero W.
- Power on the device.
- Wait for the device to boot up (the light will stop blinking).
5. Connect via SSH
Open a terminal on your computer and connect to your Raspberry Pi using SSH:
ssh username@raspberrypi.local
Replace username with the username you set up earlier. Accept the prompt and enter your password when asked.
6. Transfer Project Files
From a terminal on your computer (not connected to your Raspberry Pi), transfer the project folder to your Raspberry Pi:
scp -r /path/to/your/project/raspizerow username@raspberrypi:~/
7. Install Dependencies
Navigate to the project directory and run the installation script:
cd raspizerow
chmod +x install.sh
./install.sh
- Answer
yesto “Auto load module at boot?” - Answer
noto “REBOOT NOW?”
Enter the SUPABASE_URL and AUTH_TOKEN when prompted.
8. Reboot
Reboot your Raspberry Pi:
sudo reboot
9. Run the Application
After the reboot, navigate back to the project directory, make the run script executable, and start the application:
cd raspizerow
chmod +x compile.sh
./compile.sh
gdb ./main
Optional: Start the application with GDB for debugging
Use run within gdb to start the application in debug mode.
Congratulations! You have successfully set up your Raspberry Pi Zero W for development with your project.